LuxuryWatchesHow to change your watch strapGive your favourite timepiece a new look in a few simple stepsWhen you purchase through links on our site, we may earn an affiliate commission.Here’s how it works.
LuxuryWatchesHow to change your watch strapGive your favourite timepiece a new look in a few simple stepsWhen you purchase through links on our site, we may earn an affiliate commission.Here’s how it works.
Give your favourite timepiece a new look in a few simple steps
When you purchase through links on our site, we may earn an affiliate commission.Here’s how it works.
(Image credit: Future / Sam Cross)
(Image credit: Future / Sam Cross)
Changing yourwatch strapis a simple and effective way to shake up the look of your timepiece. Maybe you’ve fallen in love with one of thebest watcheson the market, but don’t fancy the strap or bracelet it comes with as standard. Or maybe you’re just looking to give a new lease of life to something you’ve had for a while.
Fortunately, changing a watch strap is quite a simple process. You won’t need many tools at all, and with a little patience, you can get a whole new look.
Quick disclaimer here, though – this is intended as a guide, but it isn’t exhaustive. Youcanscratch your watch if you don’t quite get it right, so if you aren’t confident, or don’t want to risk that, take it to a reputable dealer.
Step 1: Removing the old strap
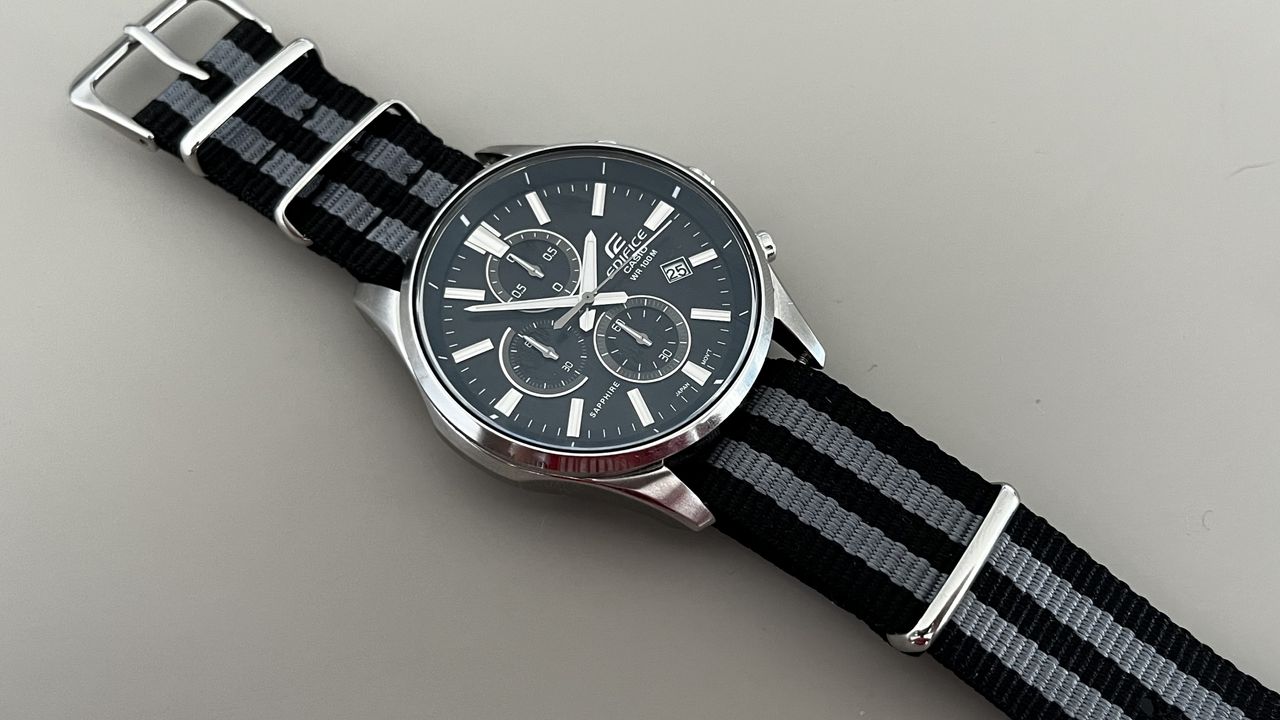
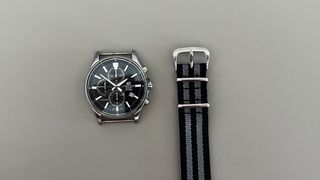
The first thing you’ll need to do is take off the old strap or bracelet. For this guide, I’m using my old Casio Edifice chronograph. That uses a traditional spring bar system to hold the strap in place.
You may find that your watch has another spring bar system. If yours has a quick release system – like myChristopher Wardwatch pictured below – simply pull the tabs into the middle to release the spring bars and gently pull the bracelet free.
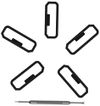
To take it out, we simply need to take the spring bar tool, and use the horseshoe-shaped end to grip the ridge on the spring bar. Apply a little force to pull it towards the middle, while pulling on the strap a little. You should hear a little ‘pop’ and be able to see some space between the endlink and the case.
Once you’ve got one side out, maintain pressure on the strap so that spring bar doesn’t pop back into place and repeat on the other side. Once this one pops out of place, pull the strap away as gently as possible, with your fingers around the sides where the spring bars are. These are under load, so can pop out if you’re not careful. When you have one side out, repeat on the other so you have just the case left.
Sign up to the T3 newsletter for smarter living straight to your inbox
Get all the latest news, reviews, deals and buying guides on gorgeous tech, home and active products from the T3 experts
Image1of5Opening the bracelet can make it easier to reach the spring bars(Image credit: Future / Sam Cross)(Image credit: Future / Sam Cross)(Image credit: Future / Sam Cross)(Image credit: Future / Sam Cross)Quick release spring bars take much less work(Image credit: Future / Sam Cross)
Image1of5Opening the bracelet can make it easier to reach the spring bars(Image credit: Future / Sam Cross)(Image credit: Future / Sam Cross)(Image credit: Future / Sam Cross)(Image credit: Future / Sam Cross)Quick release spring bars take much less work(Image credit: Future / Sam Cross)
Image1of5
Opening the bracelet can make it easier to reach the spring bars(Image credit: Future / Sam Cross)(Image credit: Future / Sam Cross)(Image credit: Future / Sam Cross)(Image credit: Future / Sam Cross)Quick release spring bars take much less work(Image credit: Future / Sam Cross)
Opening the bracelet can make it easier to reach the spring bars(Image credit: Future / Sam Cross)(Image credit: Future / Sam Cross)(Image credit: Future / Sam Cross)(Image credit: Future / Sam Cross)Quick release spring bars take much less work(Image credit: Future / Sam Cross)
Opening the bracelet can make it easier to reach the spring bars(Image credit: Future / Sam Cross)
Opening the bracelet can make it easier to reach the spring bars(Image credit: Future / Sam Cross)
Opening the bracelet can make it easier to reach the spring bars(Image credit: Future / Sam Cross)
Opening the bracelet can make it easier to reach the spring bars(Image credit: Future / Sam Cross)
Opening the bracelet can make it easier to reach the spring bars(Image credit: Future / Sam Cross)

(Image credit: Future / Sam Cross)
(Image credit: Future / Sam Cross)
(Image credit: Future / Sam Cross)
(Image credit: Future / Sam Cross)
(Image credit: Future / Sam Cross)
(Image credit: Future / Sam Cross)
(Image credit: Future / Sam Cross)
(Image credit: Future / Sam Cross)
(Image credit: Future / Sam Cross)
(Image credit: Future / Sam Cross)
(Image credit: Future / Sam Cross)
(Image credit: Future / Sam Cross)
(Image credit: Future / Sam Cross)
(Image credit: Future / Sam Cross)
(Image credit: Future / Sam Cross)
Quick release spring bars take much less work(Image credit: Future / Sam Cross)
Quick release spring bars take much less work(Image credit: Future / Sam Cross)
Quick release spring bars take much less work(Image credit: Future / Sam Cross)
Quick release spring bars take much less work(Image credit: Future / Sam Cross)
Quick release spring bars take much less work(Image credit: Future / Sam Cross)
Step 2: Installing the new strap
For this guide, I’m installing a NATO strap. This uses spring bars as an anchor point, feeding through and doubling back on itself. They’re a great option for a new strap – affordable, lots of colour options, and less likely to cause a catastrophe if a spring bar fails.
If you’re looking to install a leather or fabric strap that uses spring bars similar to a bracelet, the process is slightly different. In essence, you’re going to want to put the spring bars through the strap, then repeat the steps used to remove the old strap in reverse.
For the NATO, we’re going to first re-install the spring bars. I find the easiest way to do this is to get one end seated and then apply pressure directly over the other end until it can slot into place. Again, warning – once spring bars are under pressure, they’re liable to fly. Keep a tight grip and keep it away from your eyes.
Once the bars are in place, it’s time to add the strap.
(Image credit: Future / Sam Cross)
(Image credit: Future / Sam Cross)
How to install a NATO strap
Once the bars are in place, you can tool down. Installing the NATO strap itself is really simple, and doesn’t require anything other than your hands.
First, make sure the strap is oriented correctly. You’re going to want the buckle to face forwards on the top side of the dial. Once you have that correct, take the longer end of the strap and feed it through the top spring bar. You want to end up with just the buckle part protruding above the top of the dial, with the long part of the strap hanging on the back side of the case.
Next, pull the same longer section through the bottom spring bar. When pulled tight, this should ratchet the strap to the back of the case.
Finally, pull the longer end of the strap through the buckle on the end of the shorter piece. Pull that tight, and you’re good to go.
Image1of4(Image credit: Future / Sam Cross)(Image credit: Future / Sam Cross)(Image credit: Future / Sam Cross)(Image credit: Future / Sam Cross)
Image1of4(Image credit: Future / Sam Cross)(Image credit: Future / Sam Cross)(Image credit: Future / Sam Cross)(Image credit: Future / Sam Cross)
Image1of4
(Image credit: Future / Sam Cross)(Image credit: Future / Sam Cross)(Image credit: Future / Sam Cross)(Image credit: Future / Sam Cross)
(Image credit: Future / Sam Cross)(Image credit: Future / Sam Cross)(Image credit: Future / Sam Cross)(Image credit: Future / Sam Cross)
(Image credit: Future / Sam Cross)
(Image credit: Future / Sam Cross)
(Image credit: Future / Sam Cross)
(Image credit: Future / Sam Cross)
(Image credit: Future / Sam Cross)
(Image credit: Future / Sam Cross)
(Image credit: Future / Sam Cross)
(Image credit: Future / Sam Cross)
(Image credit: Future / Sam Cross)
(Image credit: Future / Sam Cross)
(Image credit: Future / Sam Cross)
(Image credit: Future / Sam Cross)
(Image credit: Future / Sam Cross)
(Image credit: Future / Sam Cross)
(Image credit: Future / Sam Cross)
(Image credit: Future / Sam Cross)
(Image credit: Future / Sam Cross)
(Image credit: Future / Sam Cross)
(Image credit: Future / Sam Cross)
(Image credit: Future / Sam Cross)
And that’s it – you’re done! If you’ve popped a NATO on there, it’s really easy to swap out for another NATO strap to change up the design. You don’t need to worry about tooling or removing spring bars – simply untie the strap and reinsert your new one.
That makes it a great option for changing up the look of your watch on the fly. You can get NATO straps from lots of places – the one I used here can be foundcheap on Amazon. It even comes with a spring bar tool, giving you everything you need.
Today’s best Watches deals31 Amazon customer reviews☆☆☆☆☆$2.11View$7.49View$63ViewShow More DealsWe check over 250 million products every day for the best prices
Today’s best Watches deals31 Amazon customer reviews☆☆☆☆☆$2.11View$7.49View$63ViewShow More DealsWe check over 250 million products every day for the best prices
Today’s best Watches deals
31 Amazon customer reviews☆☆☆☆☆
31 Amazon customer reviews☆☆☆☆☆
☆☆☆☆☆
$2.11View$7.49View$63View
$2.11View
$2.11View


$2.11View
$2.11
$2.11
$7.49View
$7.49View


$7.49View
$7.49
$7.49
$63View
$63View

$63View
$63
$63
Show More Deals
Show More Deals
We check over 250 million products every day for the best prices
We check over 250 million products every day for the best prices

Samsung Galaxy S25: every leak, rumour and spec we’ve heard before the launch eventThis is everything we’ve heard about the new handsets
This is everything we’ve heard about the new handsets

This case turns your iPhone or Android phone into an e-reader, but there’s a catchActually, there are a couple…
Actually, there are a couple…
